
There are several ways to connect an ECU to an ADU, this can be done in 2 ways: CAN bus or RS232 (serial). In addition to these 2 communication options, it is also possible to directly connect sensors so that the ADU can be used independently. We explain this in another Tech Tips blog.
CAN-bus
If a CAN bus is chosen, the ECU can be connected to CAN1 (where the CAN bus speed of the ECU is 1 Mbps) or to CAN2 bus, where you can define the speed of the CAN bus. It is important for a good CAN bus network that twisted wire is used and that the network is terminated on both sides with a resistance of 120 ohms. This resistor can be activated via software on CAN bus 2. CAN bus 1 will have to be fitted with a resistor in the cabling. Many ECUs also have a built-in selectable resistor. This is also the case with the Ecumaster EMU Black.
If the ECU has a CAN bus speed of 1Mbps, it can be connected to CAN bus 1 or 2. If the speed is lower than 1Mbps, connect the ECU to CAN bus 2. This can be set to different speeds .
Connecting the cables:
CAN-bus 1: pin 3 CAN H and pin 4 CAN L
CAN-bus 2: pin 5 CAN H and pin 6 CAN L
Setup ECU (CAN bus):
The EMU Black ECU is set as standaard in the ADU. To add another ecu remove the EMU Black from the project tree.
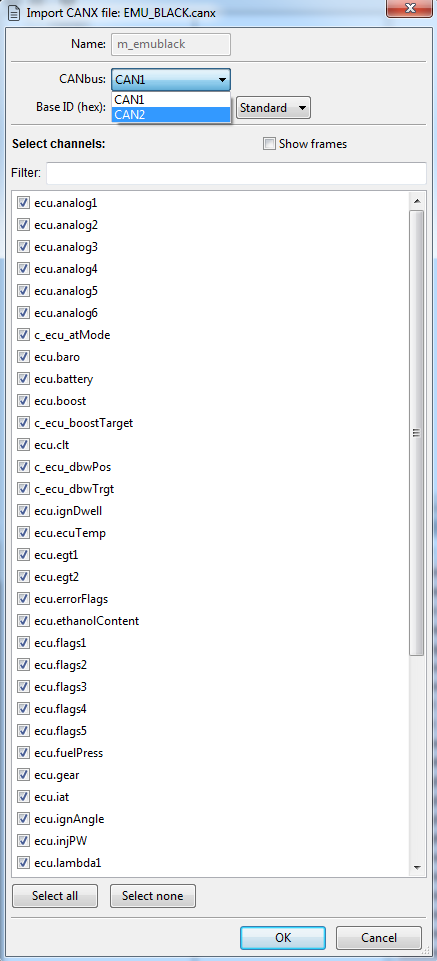
Now click add and Import .CANX/.DBC file. Select the ECU from the list )/documents/adu/canx and open the file.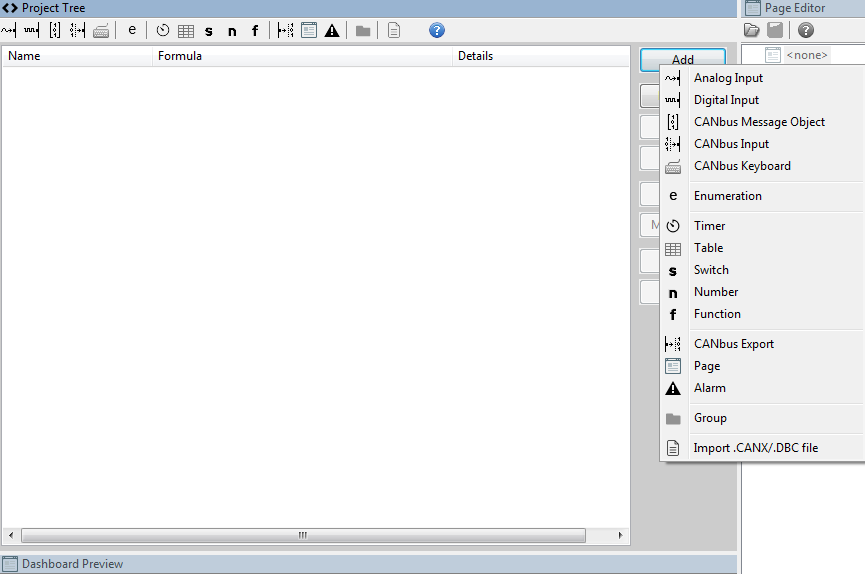
Various ECUs are located in the documents/adu/canx folder. Select the correct ECU and click open. If the correct CANX file is not listed, please contact us.
It is then selected to which CAN bus the ECU is connected and which ID is used. Our CANX files contain the default IDs used by the manufacturer. This may differ if it is set differently in the ECU. Select the channels required for display and/or data logging.
Now the ECU has been added to the project tree. Known channels are automatically linked to ecu.xxx channels. These ecu.xxx channels are used in the standard screens, so that all meters and settings do not have to be changed every time a different ecu is selected.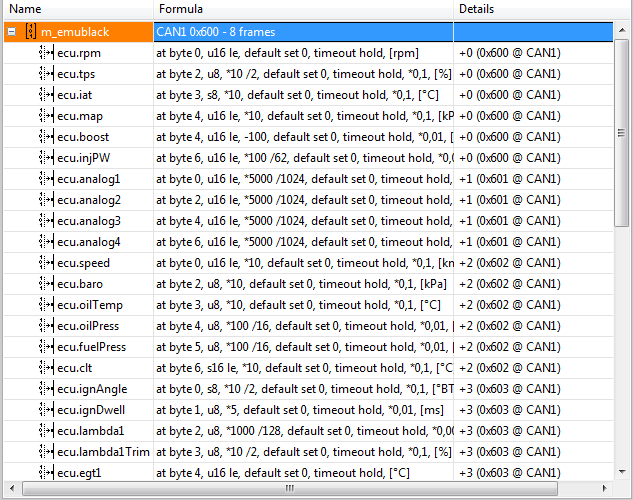
OBD2
Connecting to the OBD2 port is also an option, making the ADU easy to use in a standard car with OBD2 port.Pin 6 op de OBD2 connector wordt aangesloten op pin 5 (CAN 2 H) op de ADU en pin 14 van de OBD2 connector op pin 6 (CAN 2 L) van de ADU.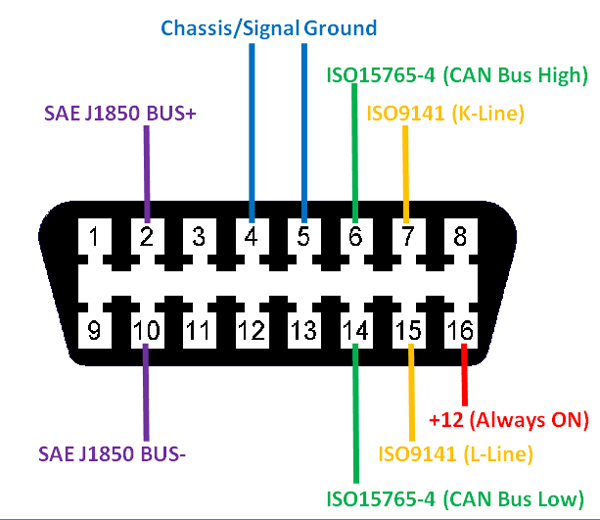
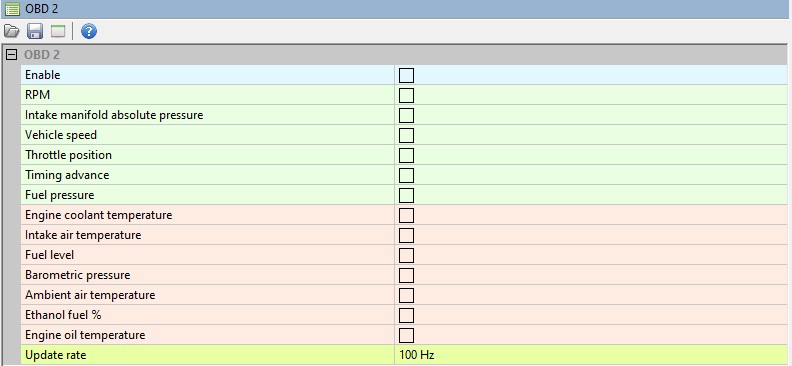
Open the OBD 2 panel in the software and select the desired channels.Please note that not all channels are availible, this depends on the manufacturer/type of the car. It is important that the CAN bus speed of CAN 2 is set to 500kbps.
RS232
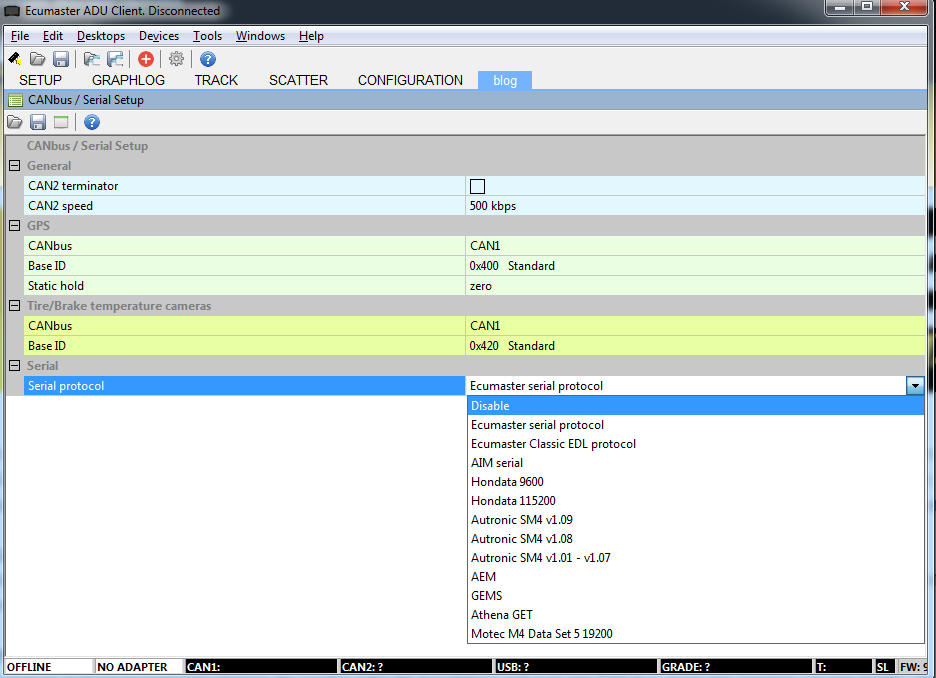
RS232 can be connected to pin 7 RXD and pin 8 TXD. Note that transmitting from the ECU is connected to receiving (RXD) from the ADU and receiving from the ECU is connected to transmitting (TXD) from the ADU. To configure the serial protocol (according to the connected ECU), the correct protocol must be selected in the CANbus/Serial window (Ecumaster serial protocol, Ecumaster EMU Classic EDL1 protocol, AIM, Hondata, Autronic SM4, AEM, GEMS, Athena GET, MoTec M4 DATASET5).
If the correct ECU is not in this list, please contact us so that we can add it to the software.